Antipodal Adventures
The Forging of the Rings
Wednesday 25th March 2015
Cast your mind back, if you will, to that "design and technology" class you did at school, where you had to do metal work, but really all anyone ever wanted to do was play with the flamethrower at the back of the classroom that the teacher wouldn't let you near. Now imagine the epic Lord of the Rings, as the One Ring To Rule Them All is pulled triumphant from the forging fires of Mount Doom by Sauron. Now combine those two images - and you have exactly what we did last Wednesday. Yes, indeed, we forged our own wedding rings, with fire and ineptitude*....
* actually Jan was pretty nifty with the tools. Me however....
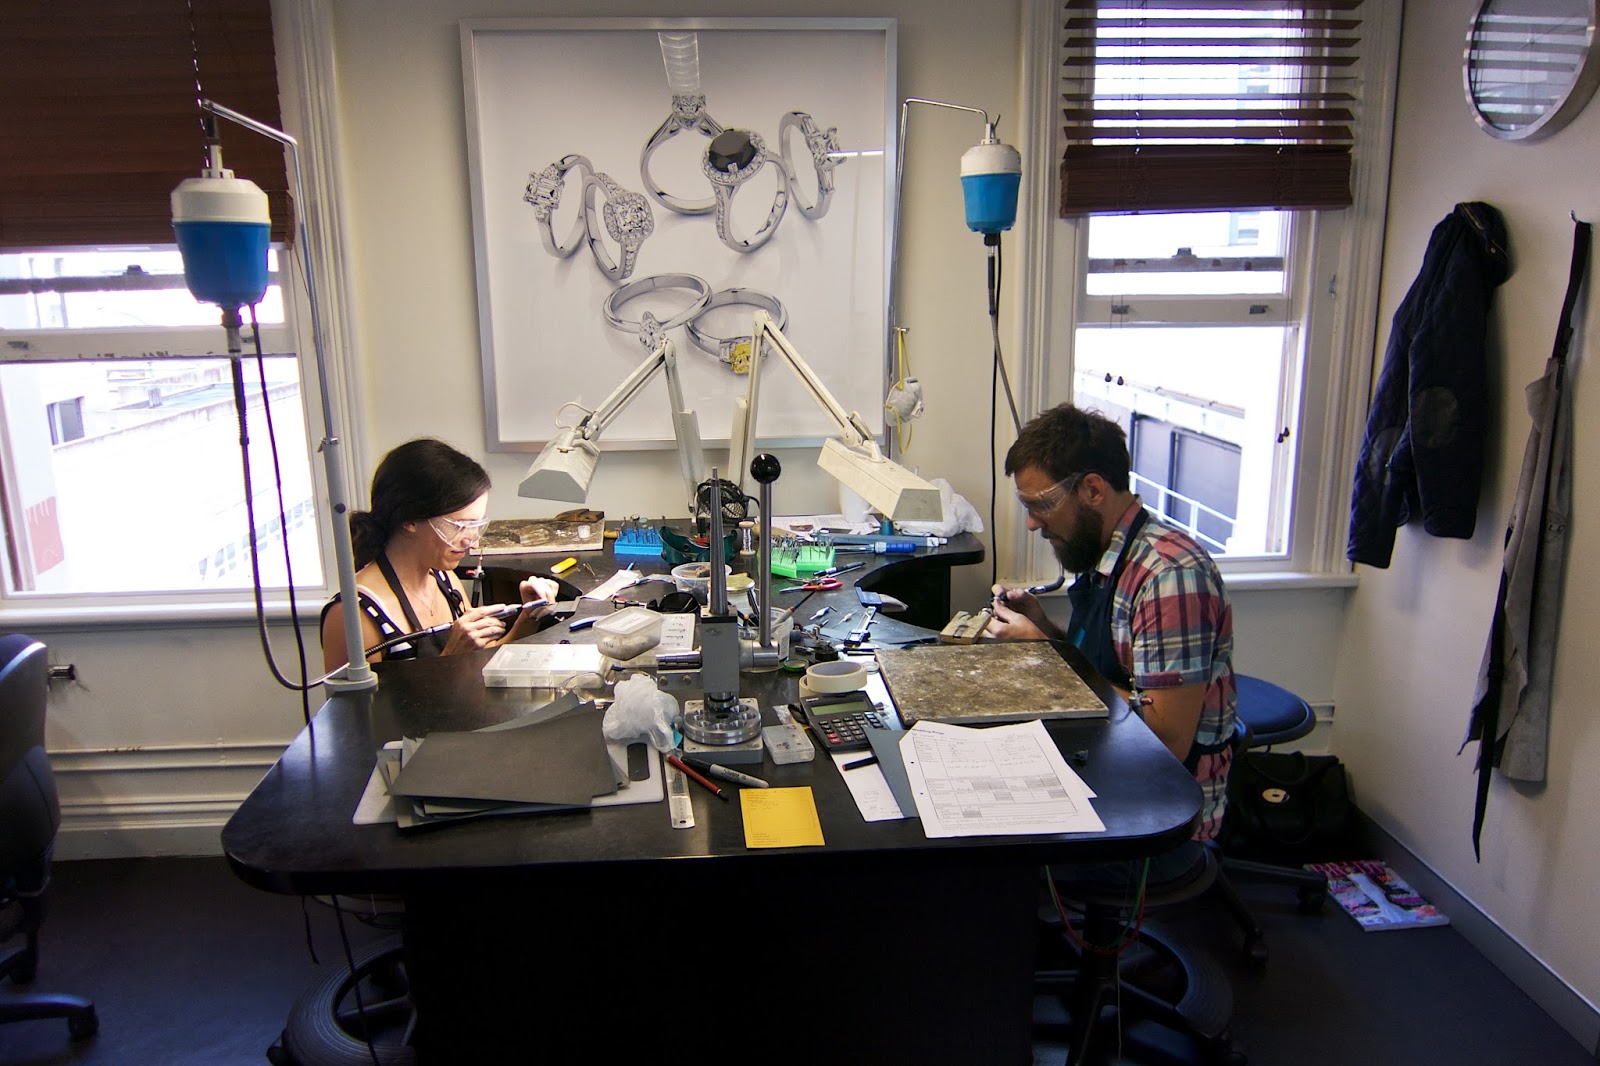
We'd already had a consultation with the wonderful folks at Larsen Jewellery to decide on our rings. It was meant to last an hour, but, come on, this is us we're talking about! We were still there two hours later - Jan couldn't decide what metal he wanted OR which ring finger to use* and I couldn't decide on sparkly versus plain. Eventually the long-suffering staff said we could decide on the day, just please get out already.
* German tradition favours the right hand, as opposed to the left.
So last Wednesday, we arrived keen and ready to go - and still completely undecided on what we were going to opt for. Which didn't immediately matter as all we had to work with was this:
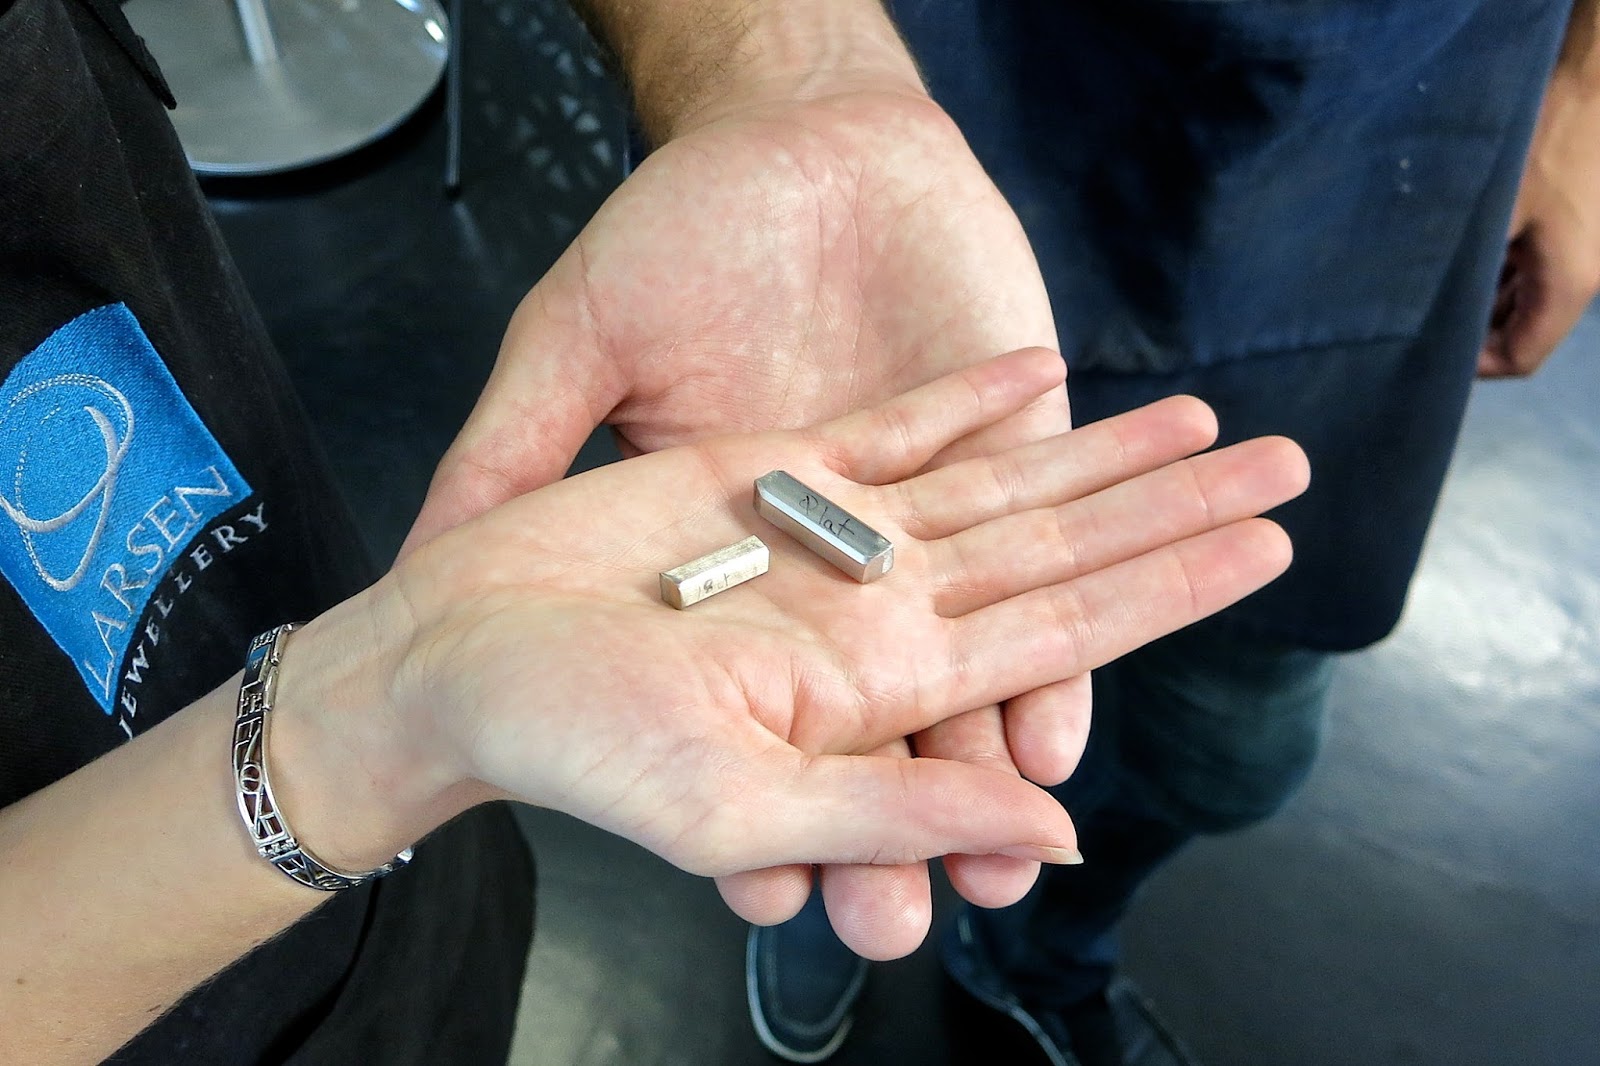
Note the giant hunk of platinum for Jan's ring, versus the, ahem, slightly more modest amount of white gold for my ring. Jan had decided he wanted an unusually wide ring*, which even had the jeweller slightly worried, as she'd never made one that big before and warned us we would have to be careful as we rolled out the metal, as platinum is not so easy to manipulate as some other metals. But like the optimistic fools we are, we weren't going to let making a stupidly large ring out of difficult-to-work-with material stop us - we like a good challenge! So off we went!
*ooh er missus. Sorry, couldn't help it.
First, you put the metal bars through some bloody great rollers...
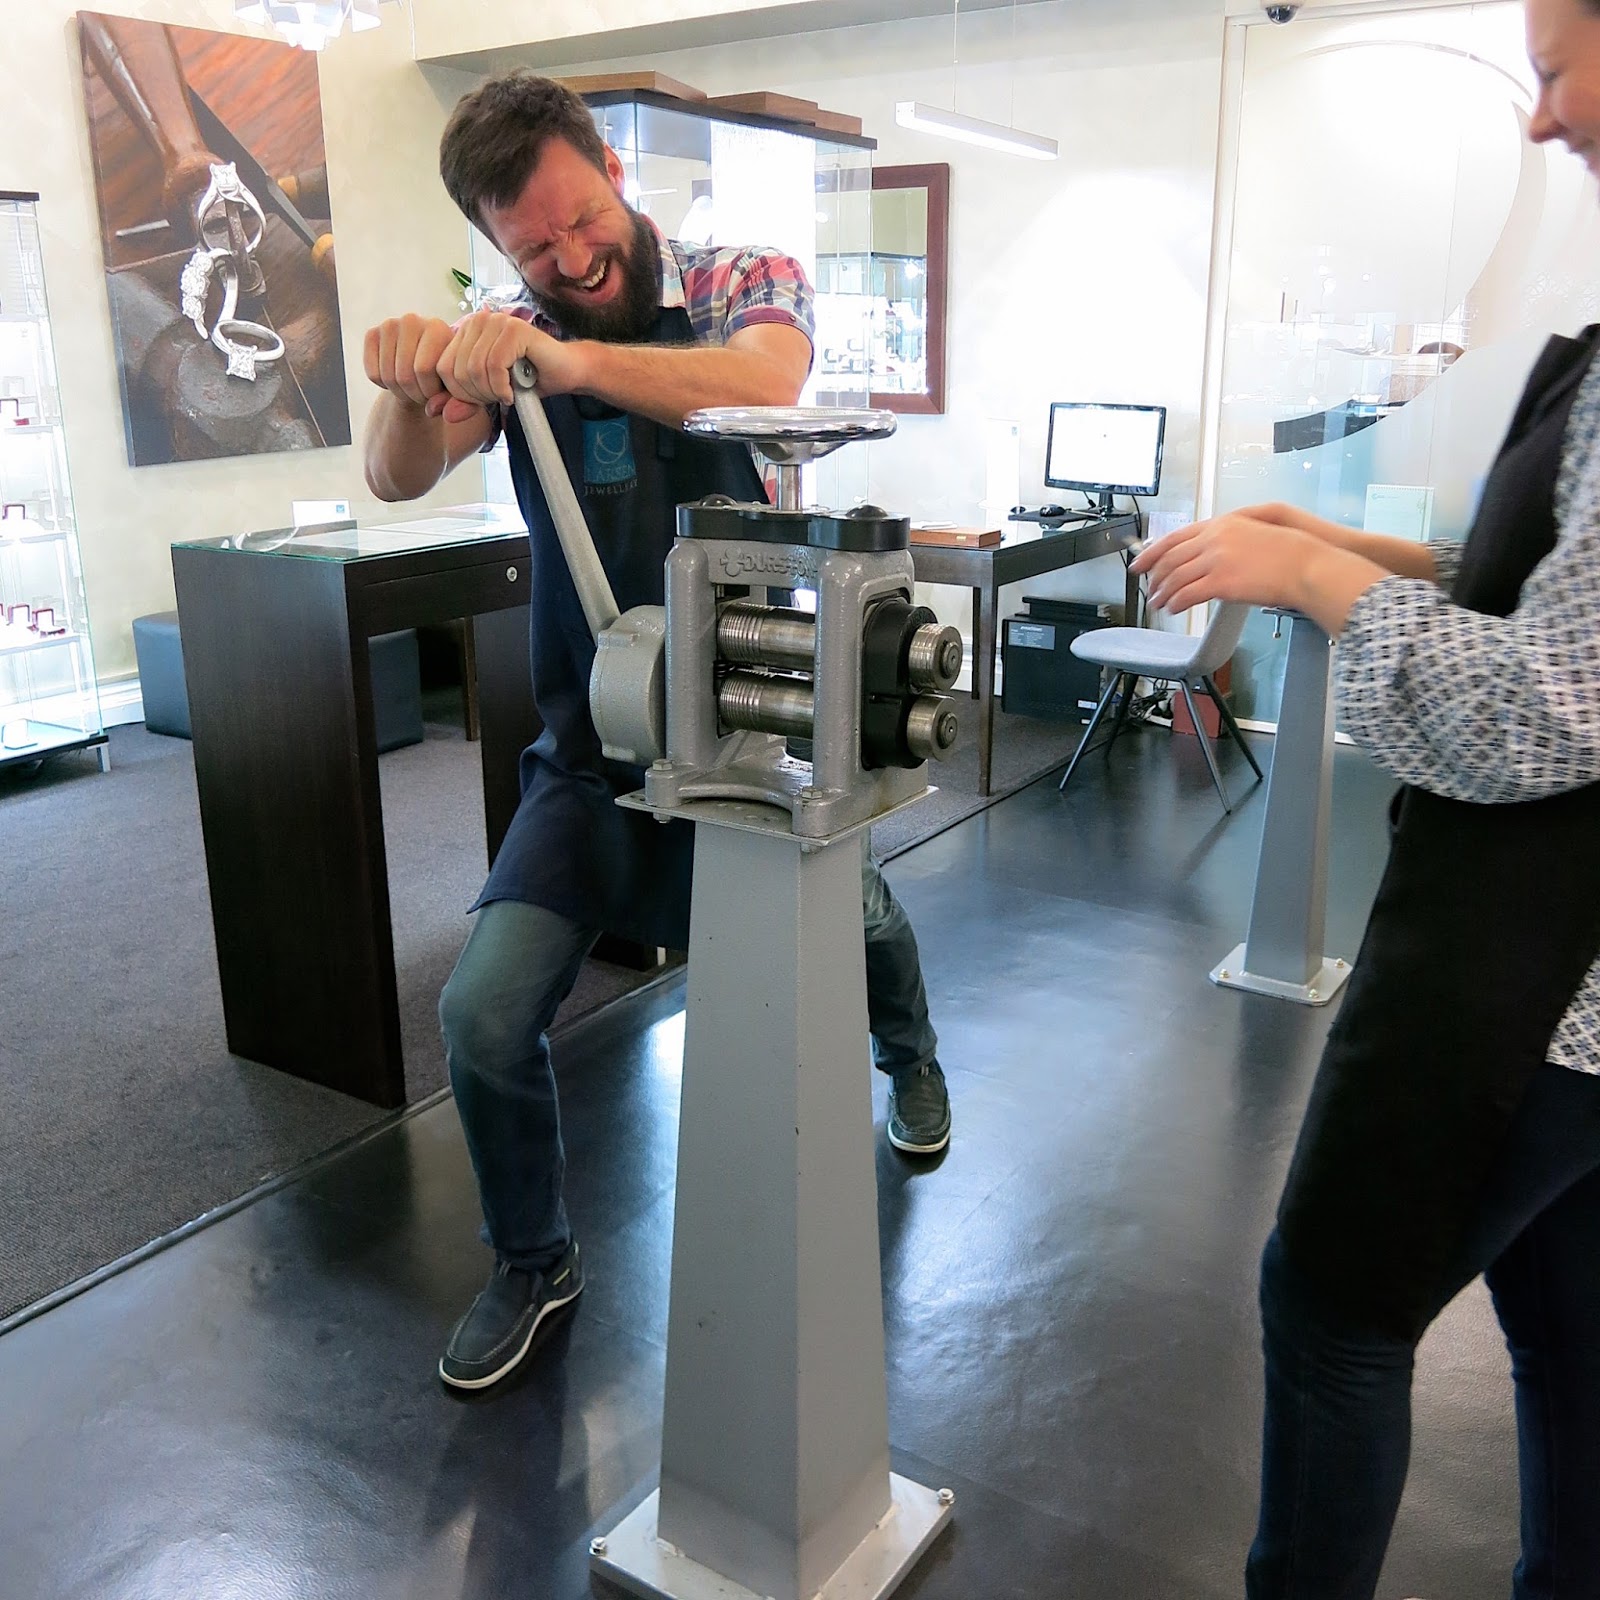
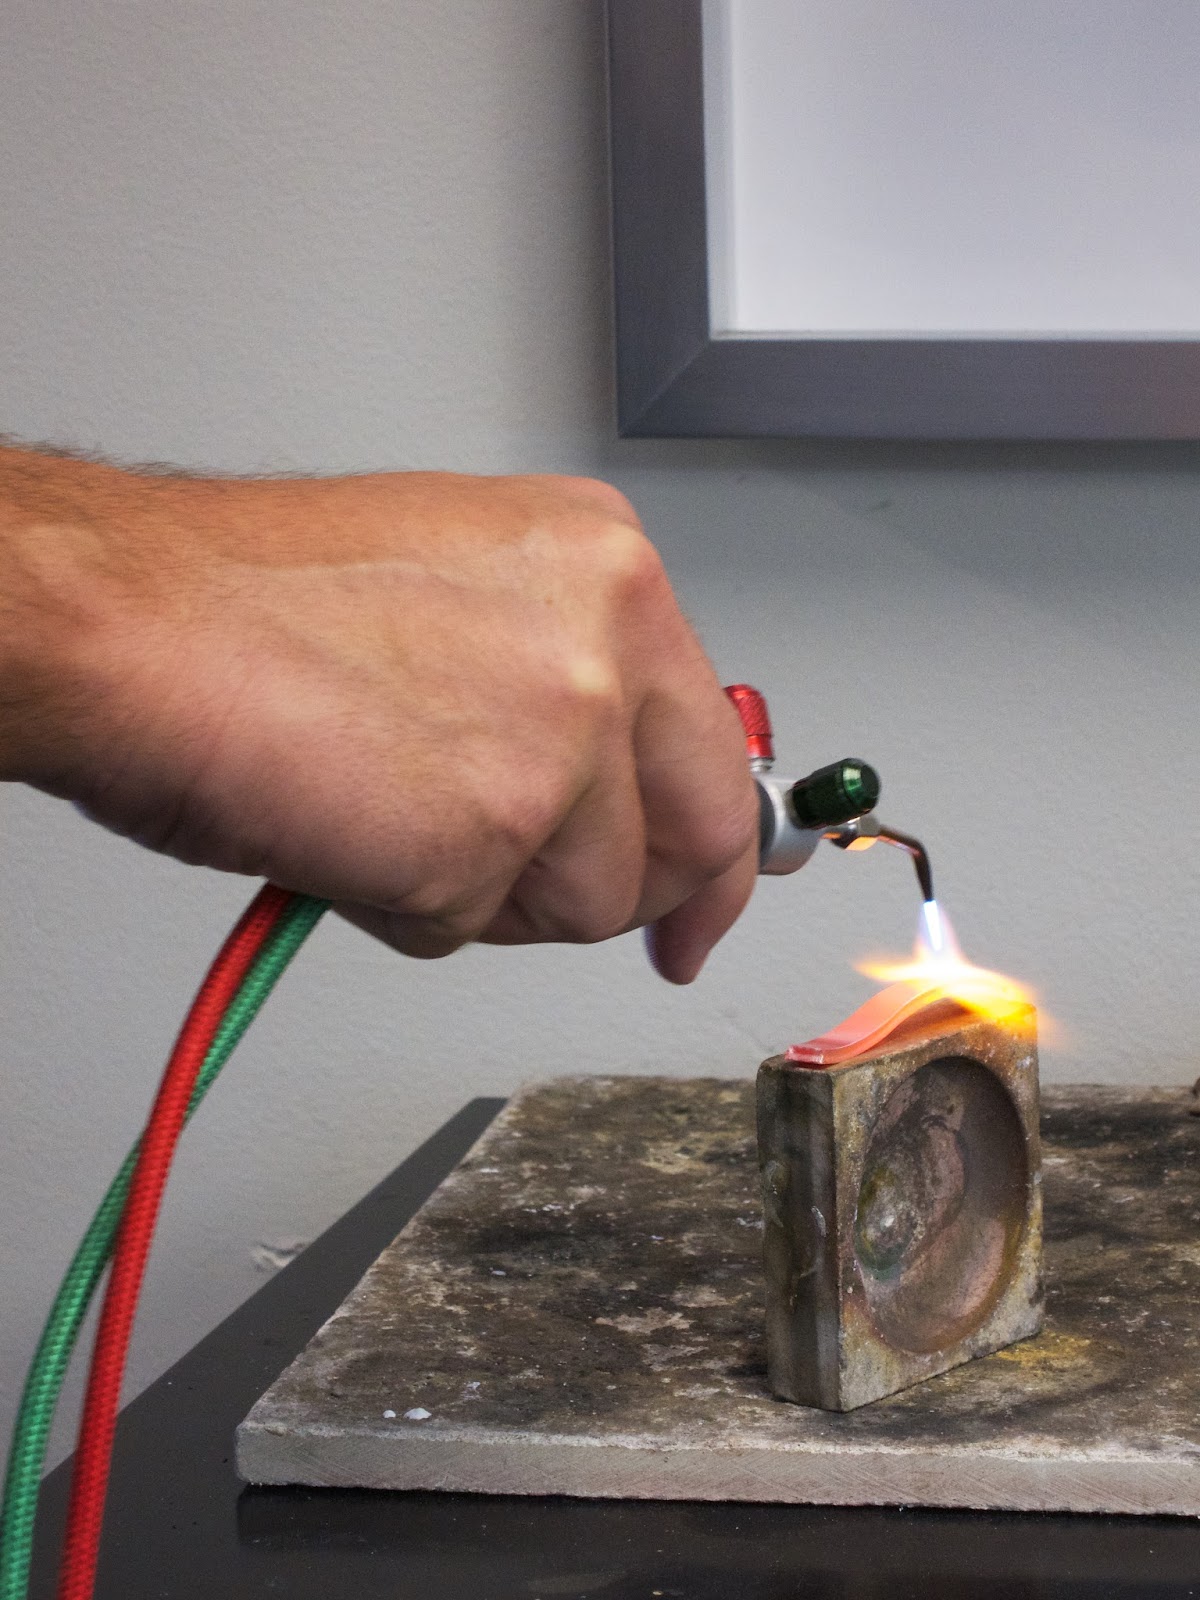
Ok, ok, Jan's hamming it up here - it's not really that difficult! Although his platinum did take a lot of squishing. After a few goes through the rollers the metal becomes hard and difficult to work with, so you have to anneal it, which basically means heating it up to release the pressure and make it more pliant again:
Then it's back to the roller for another round - then rinse and repeat until you have the width and length you require*: * Hahahahaha. Sorry.
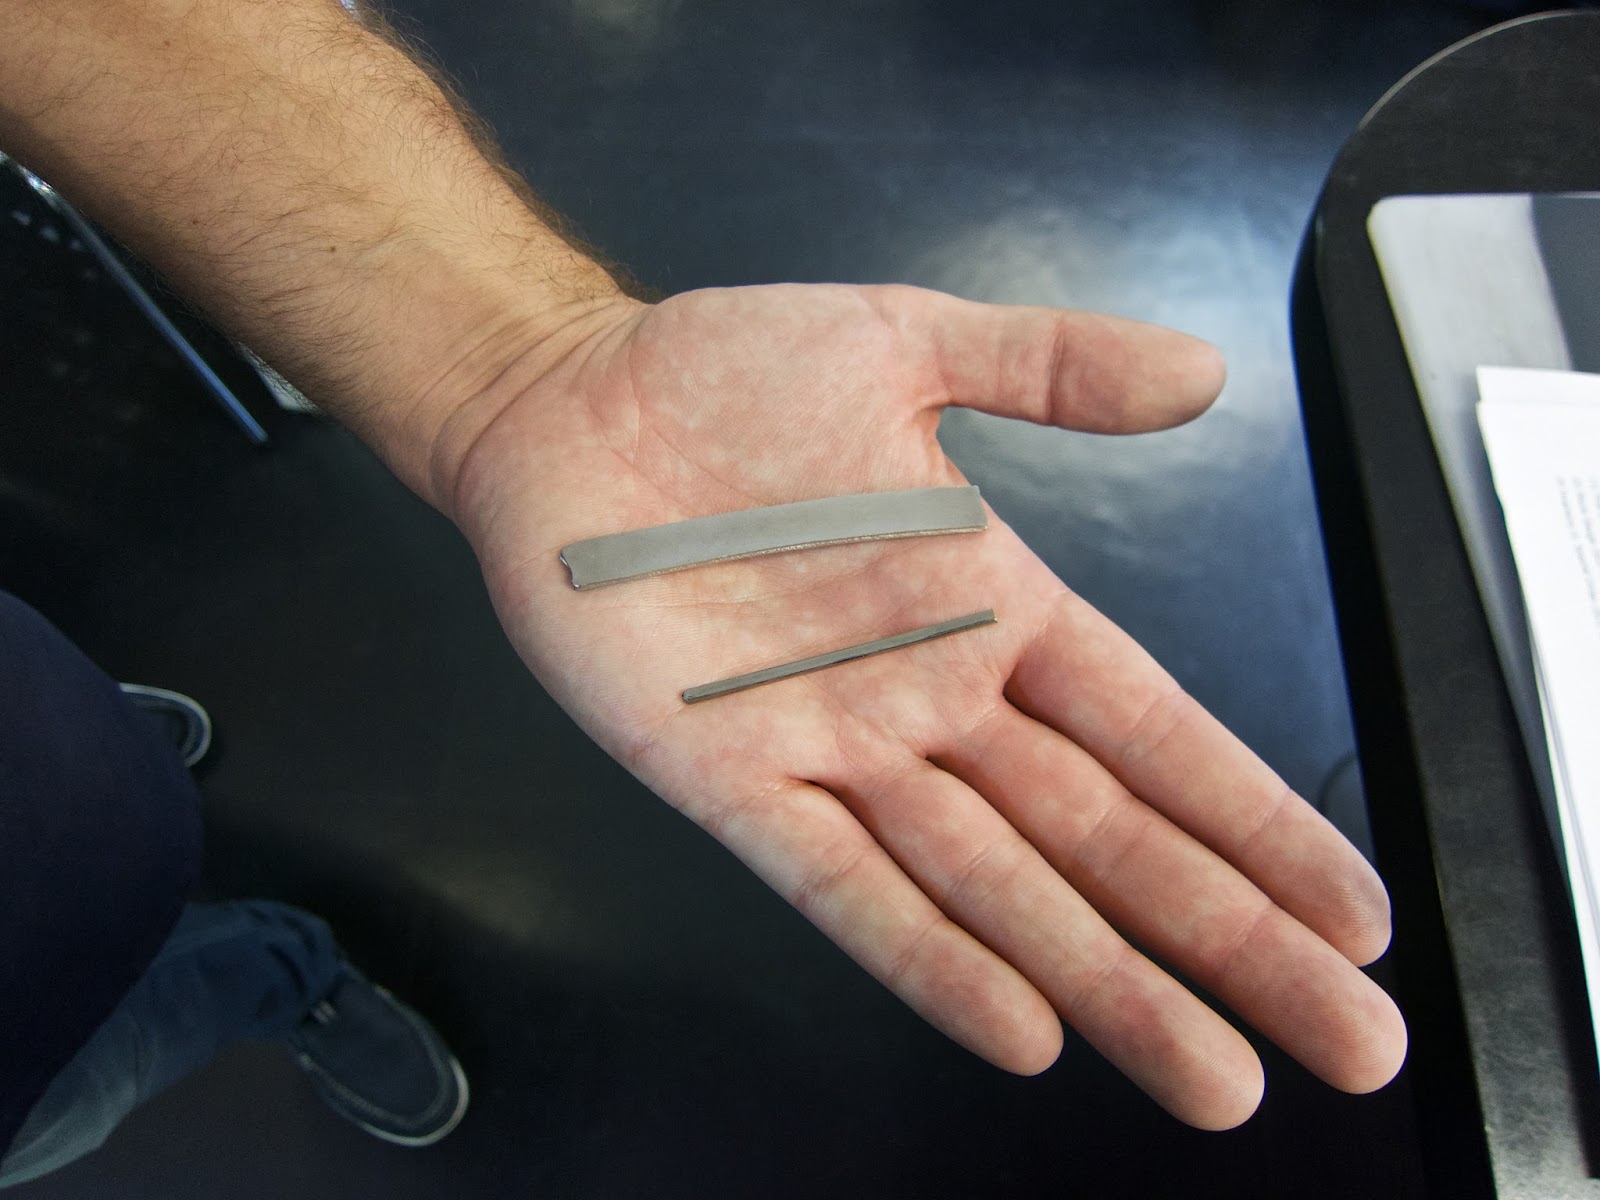
I think you can guess whose is whose.... Suffice to say, Jan's took about FOREVER to get to this stage and mine took about five minutes. Well, ok, maybe more than that, but still. We had to roll Jan's ring sideways as well as lengthways, use both a vice and a hammer to straighten it out and repeatedly anneal it to get the right dimensions. Basically, I'm calling Jan high maintenance here.
From this, mine was then cut in half, as there was more than enough metal for my tiny finger. Then it was time to get it into shape:

This is one of numerous photos where the look on my face is in a kind of, "Oh god, why are they letting me be responsible for this, I'm totally buggering up an expensive piece of metal here - and I have to wear it for the rest of my days, oh god, oh god, smile for the camera" expression. Naturally Jan got his ring into a lovely shape*, whilst mine had to be take away to the vice to be straightened out.
* Honestly, I am really fighting not to have this turn into an innuendo-laden mess, but... it's.. just... so...difficult...
After this, it was time to saw off any extraneous metal:
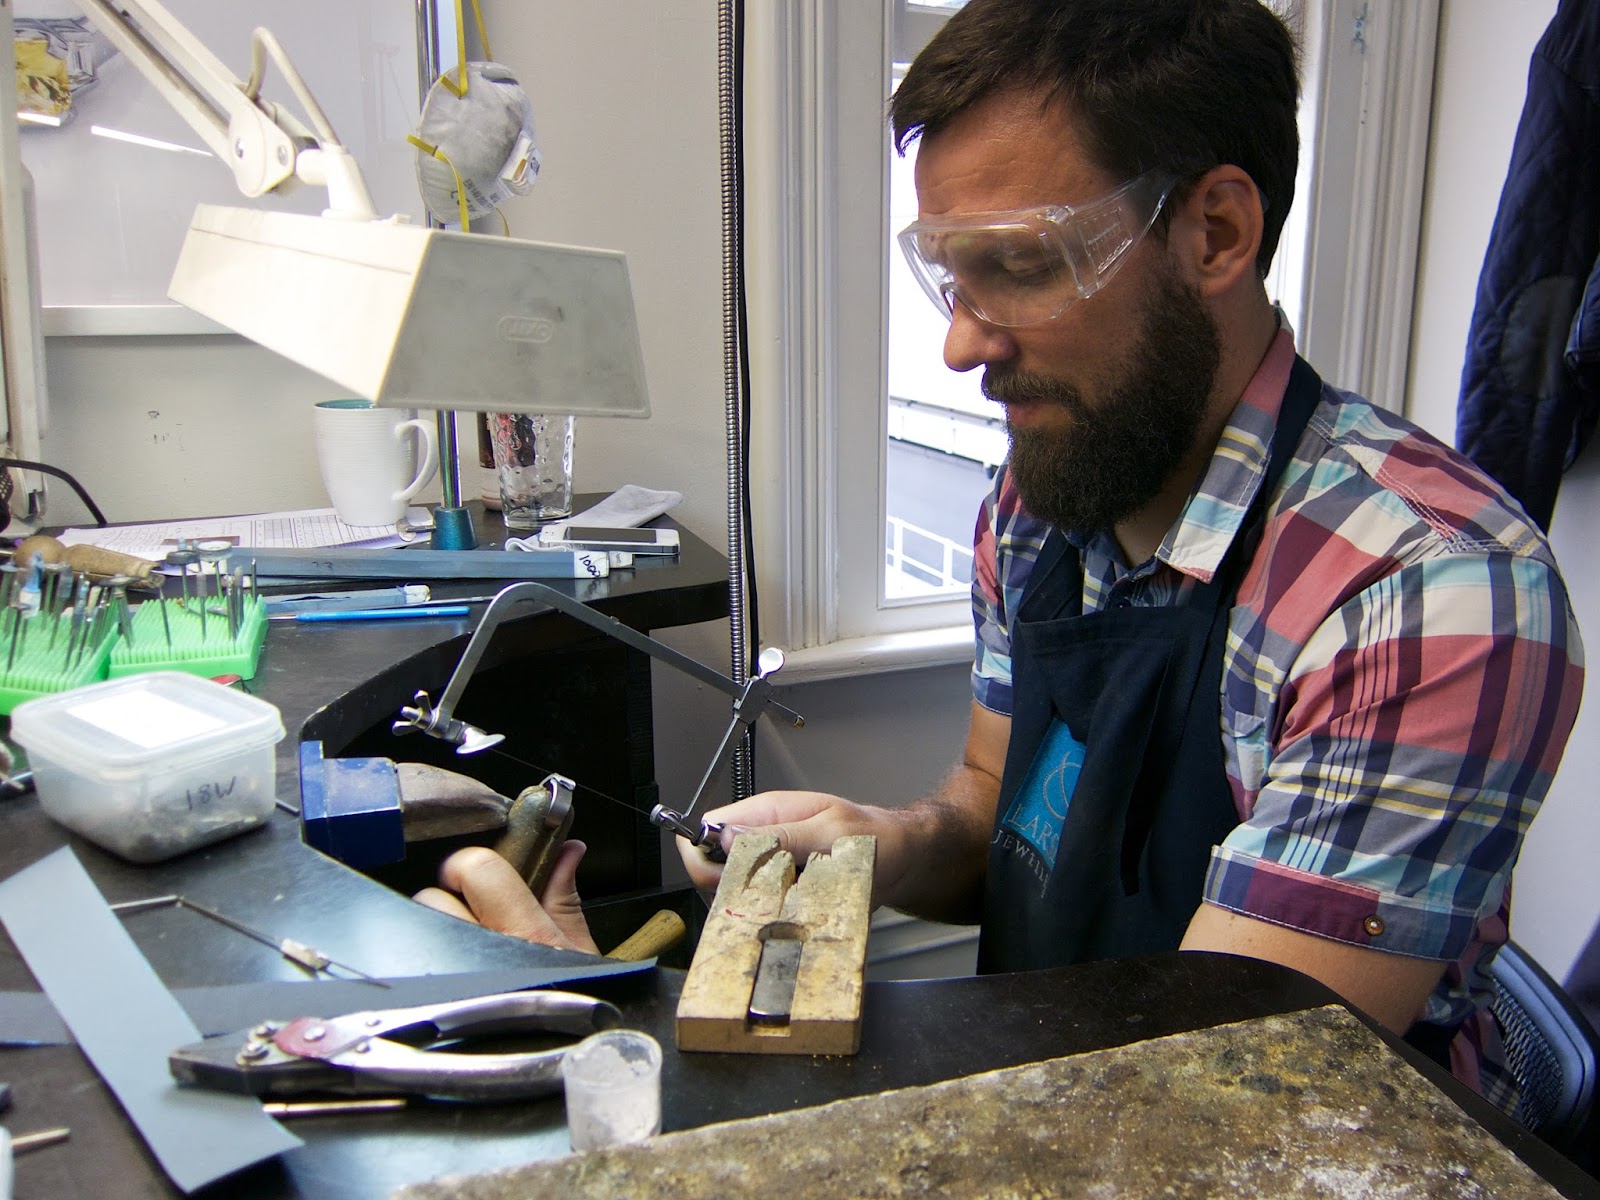
Then you finally have an actual ring! Well, a piece of metal in the shape of a ring anyway. The next big task is to solder the two ends together to join them. For this, you need highly specialised equipment:
Nothing to say about that. Moving on.
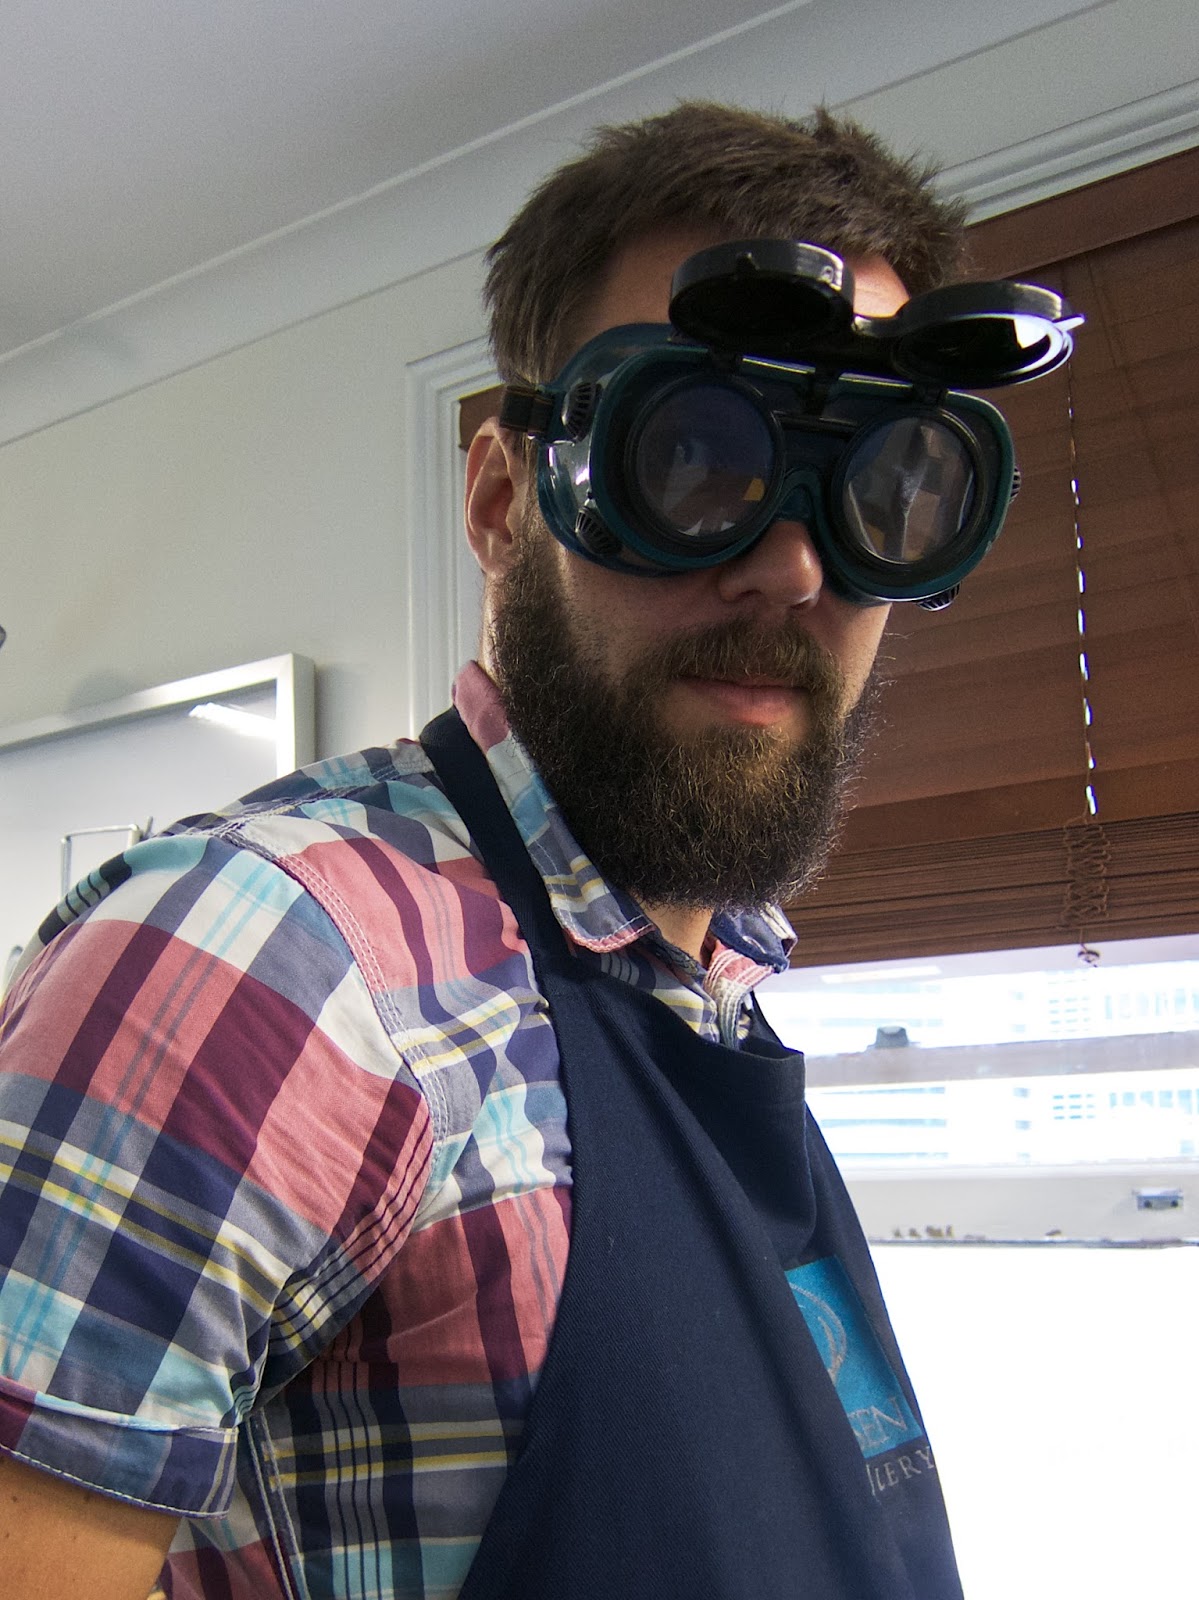
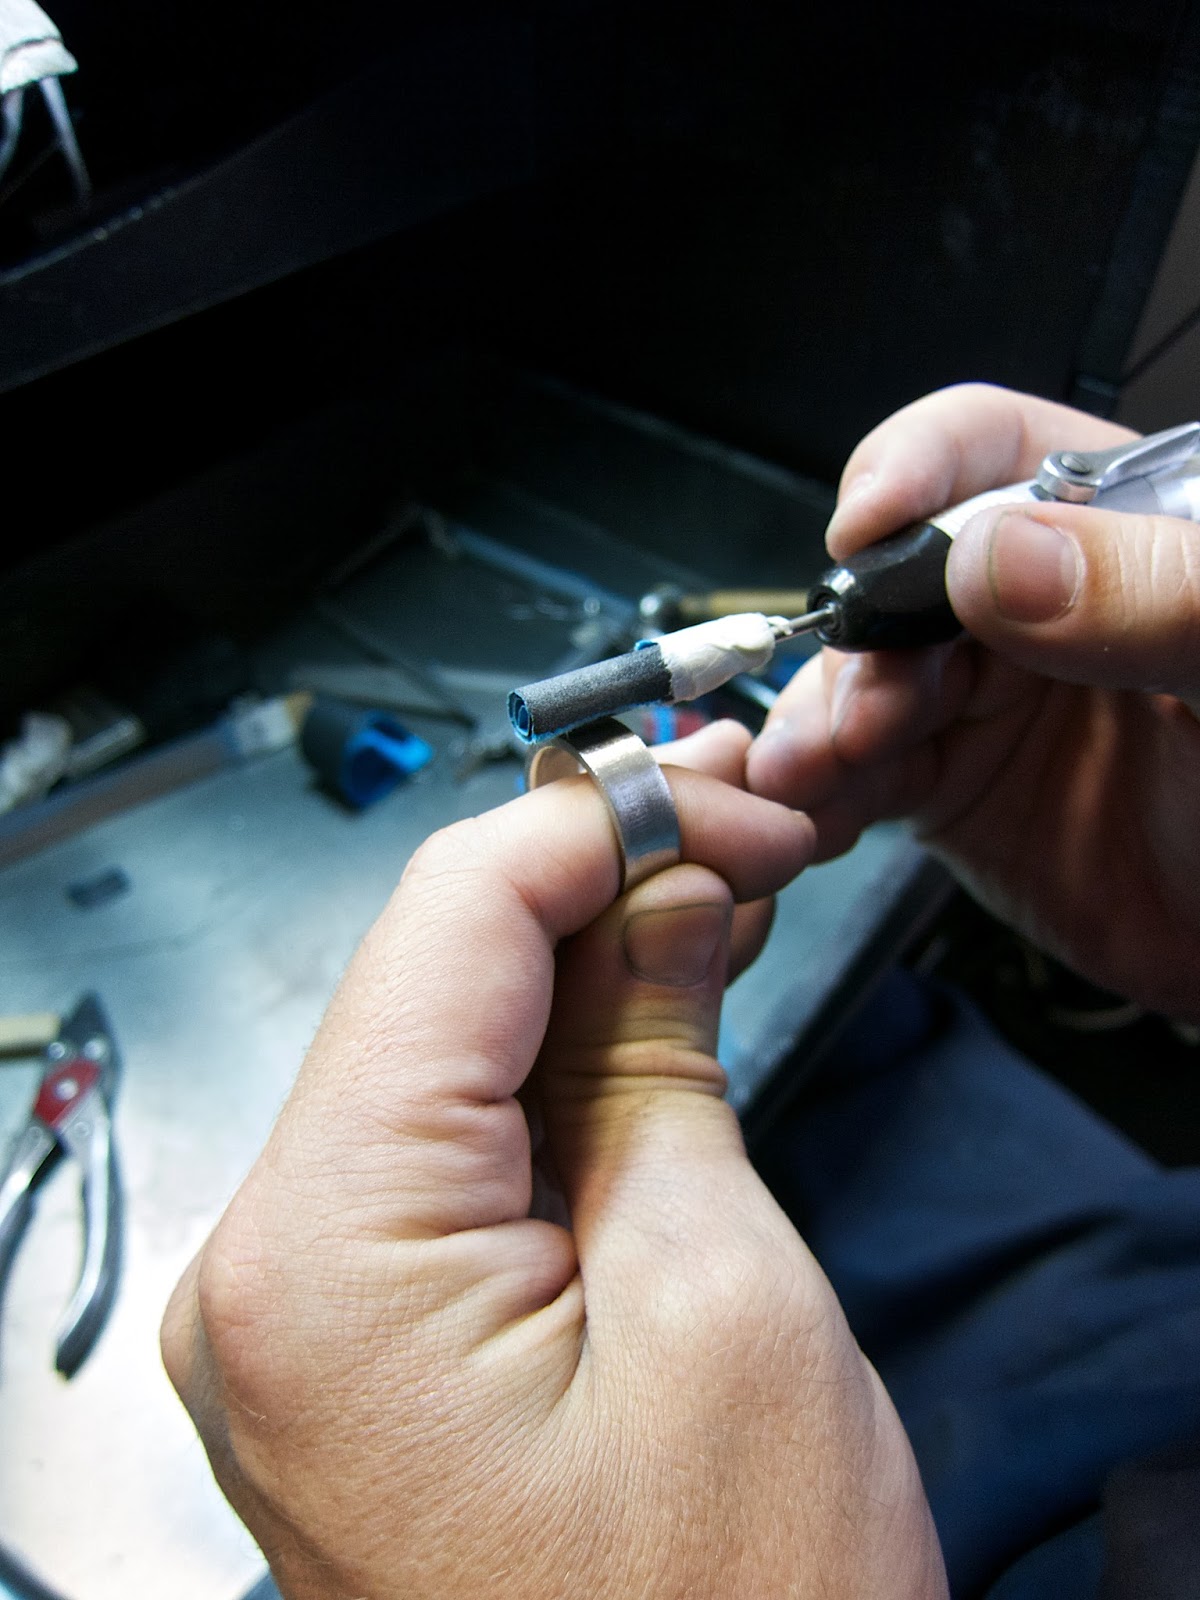
This is me soldering my ring. I got 'normal' glasses because my ring, being gold, didn't glow so brightly as Jan's when heated, so it wouldn't burn the retinas out of my head.
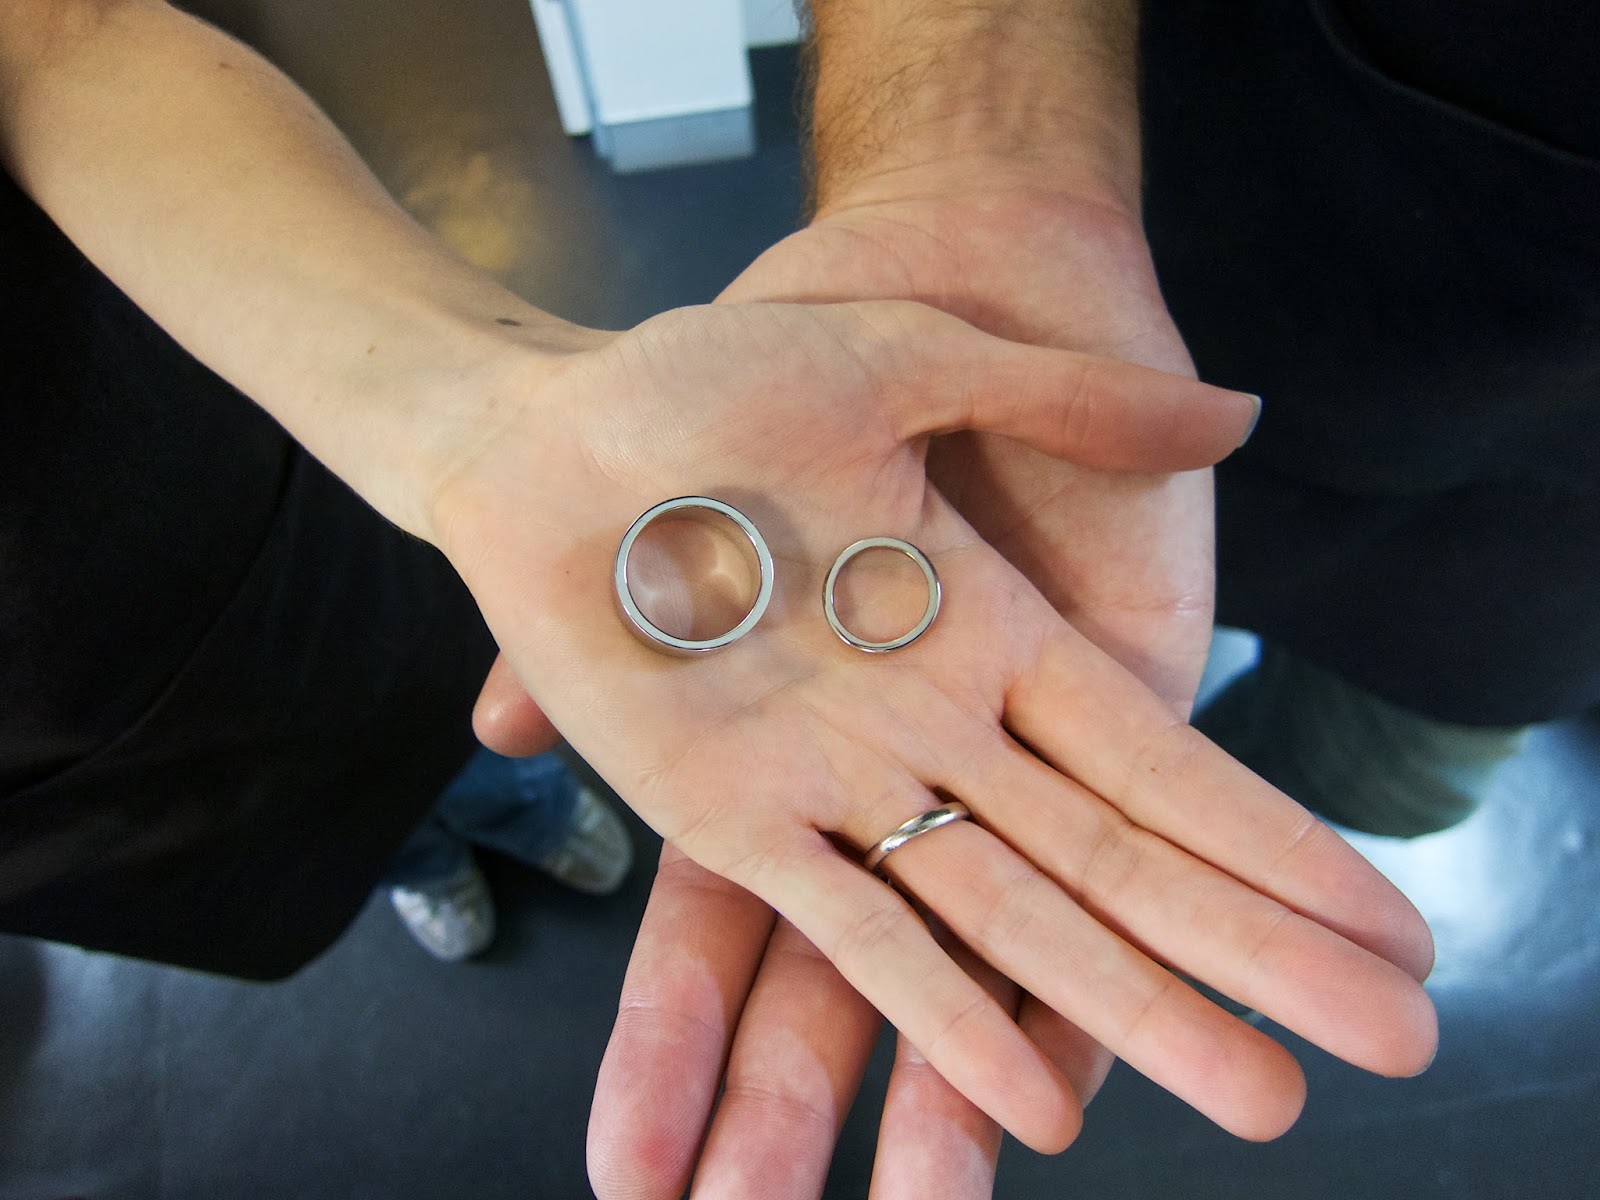
After a mere FOUR HOURS of work, you finally end up with this...
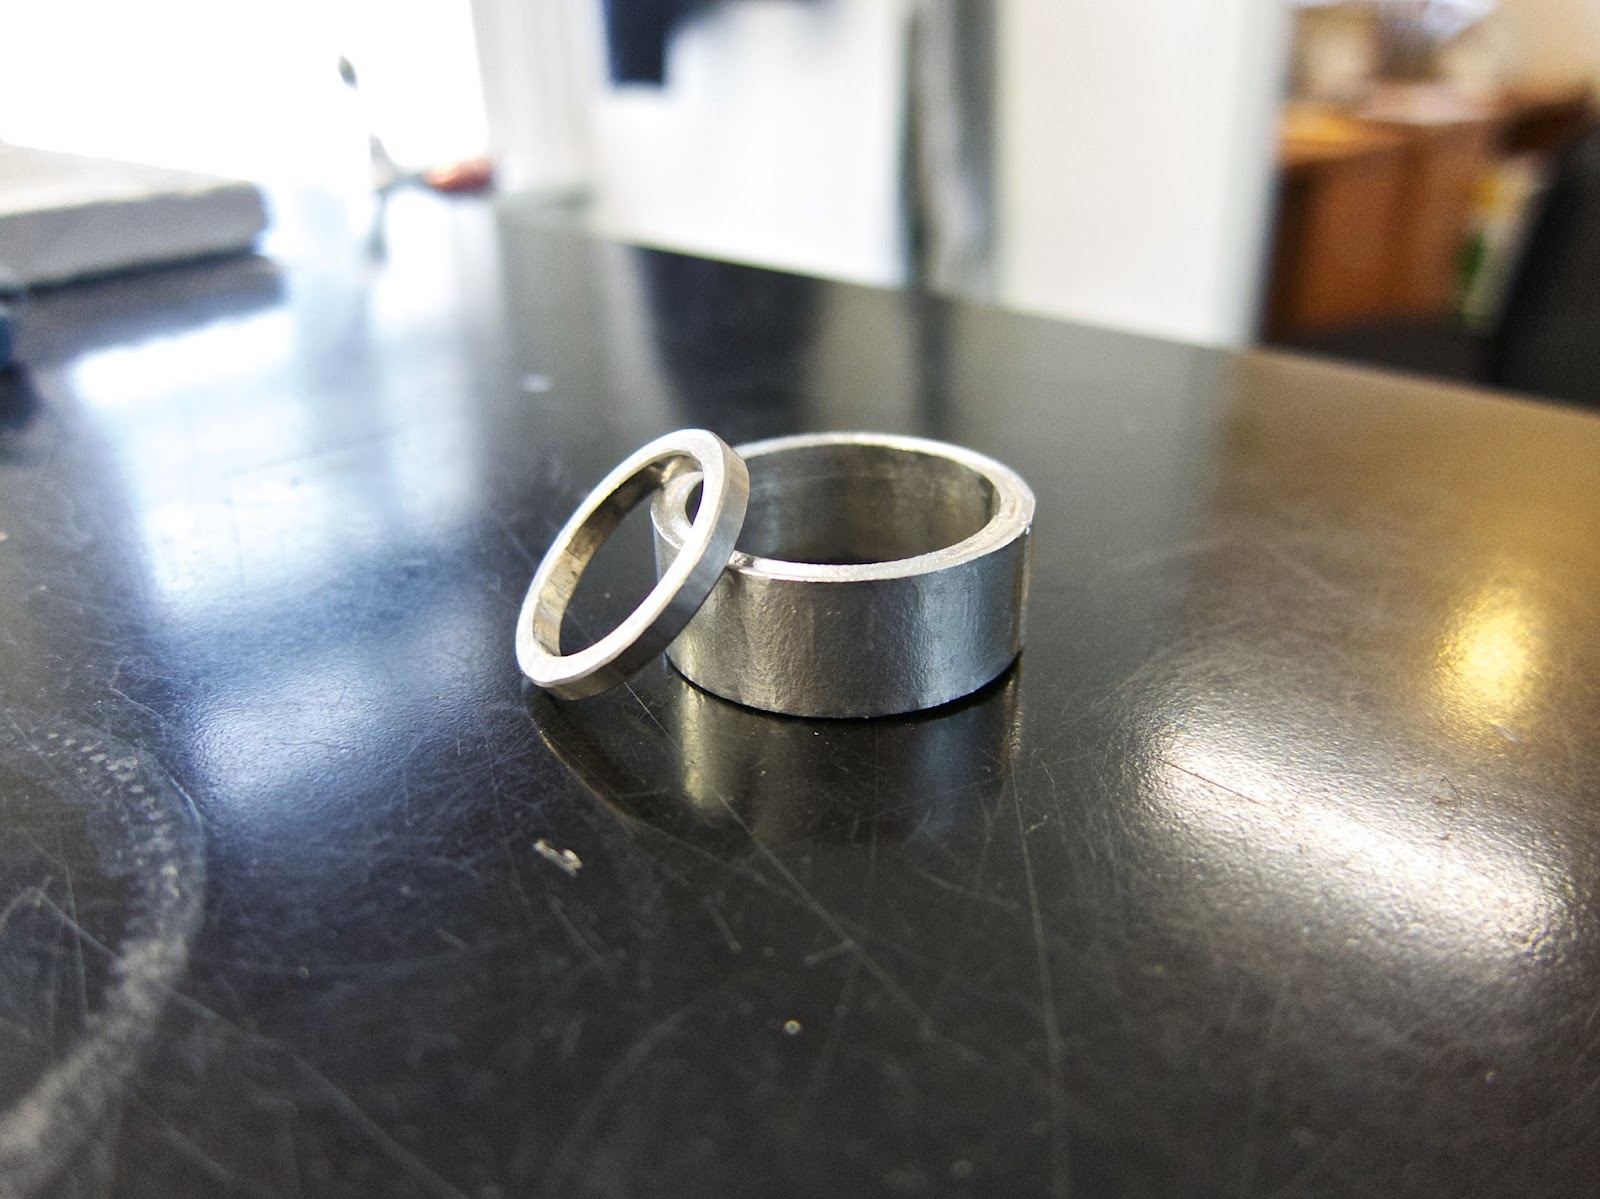
..coupled with a rather large sense of achievement. I made dis - all by my own self! And yes, now you can really see why Jan's took so damn long. IT'S HUGE! In fact it's so huge mine fits snugly inside his!
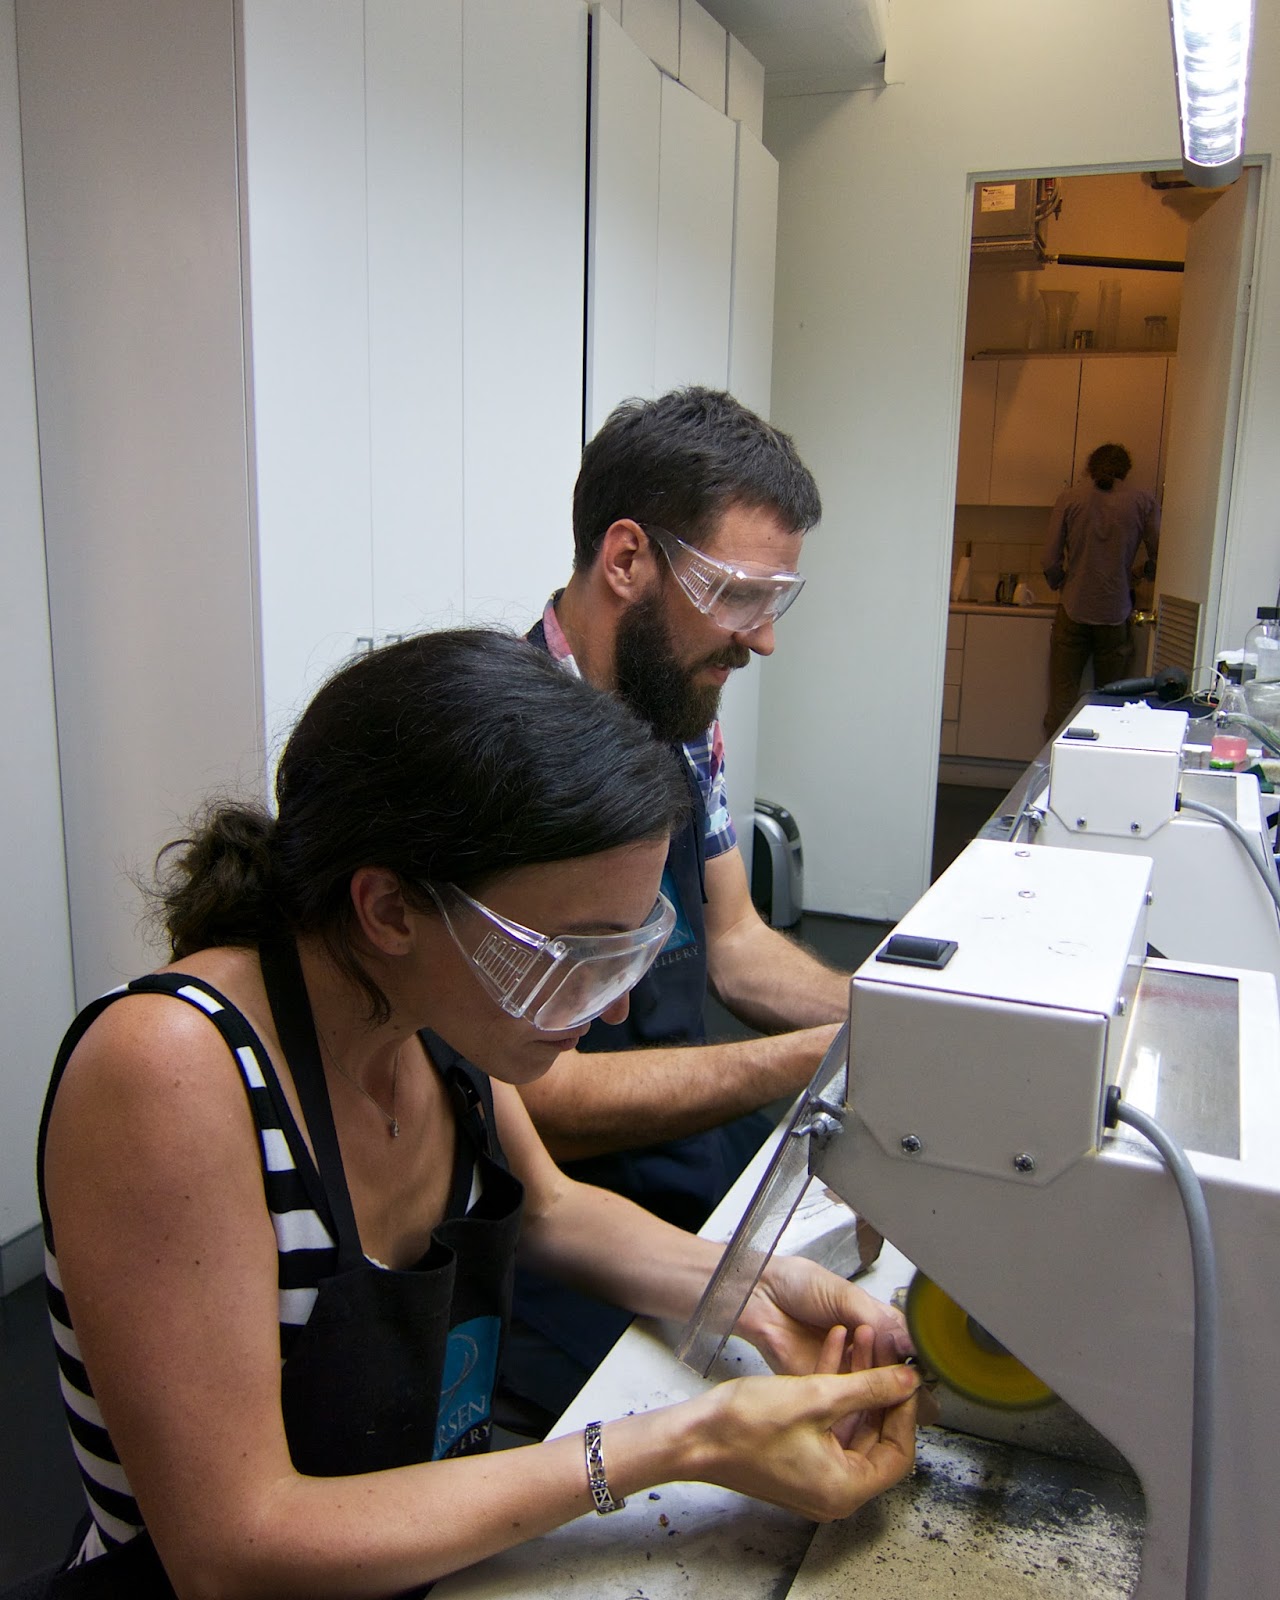
Now you have the basic shape, it's time to fancypants it up a bit. We start with the filing:
Basically, it's sandpaper on an electronic stick.
Mine took forever to file, as I was basically terrified of letting the sandpaper touch the ring in case I inadvertently filed the whole thing apart*. Jan's took forever because... well... you know.
* This is IMPOSSIBLE. But still, it's me we're talking about here.
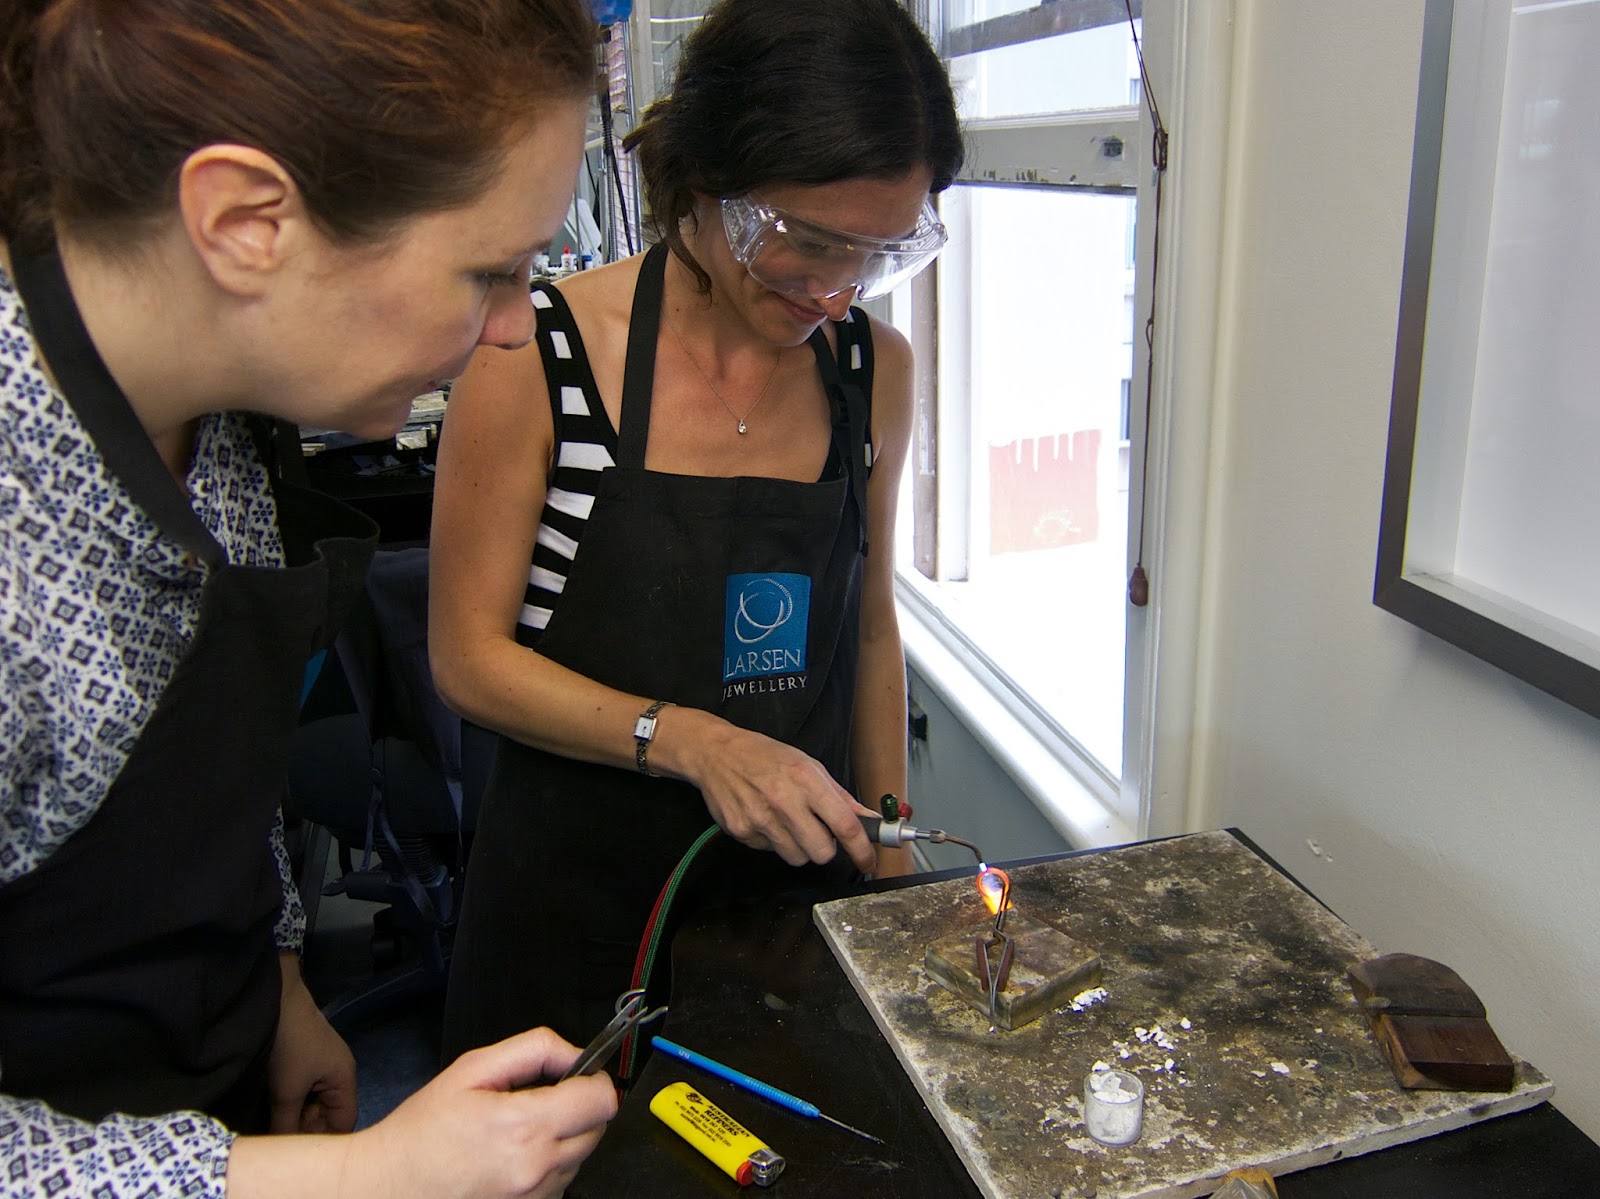
Next, if your nerves haven't been tested enough with all the responsibility of rolling, melting, bending and filing your ring, it's time for the real white-knuckle activity - the stamping. Although this time, my fear wasn't for damaging the ring. Rather it was for damaging the fingers of the poor, poor lady holding the stamp:
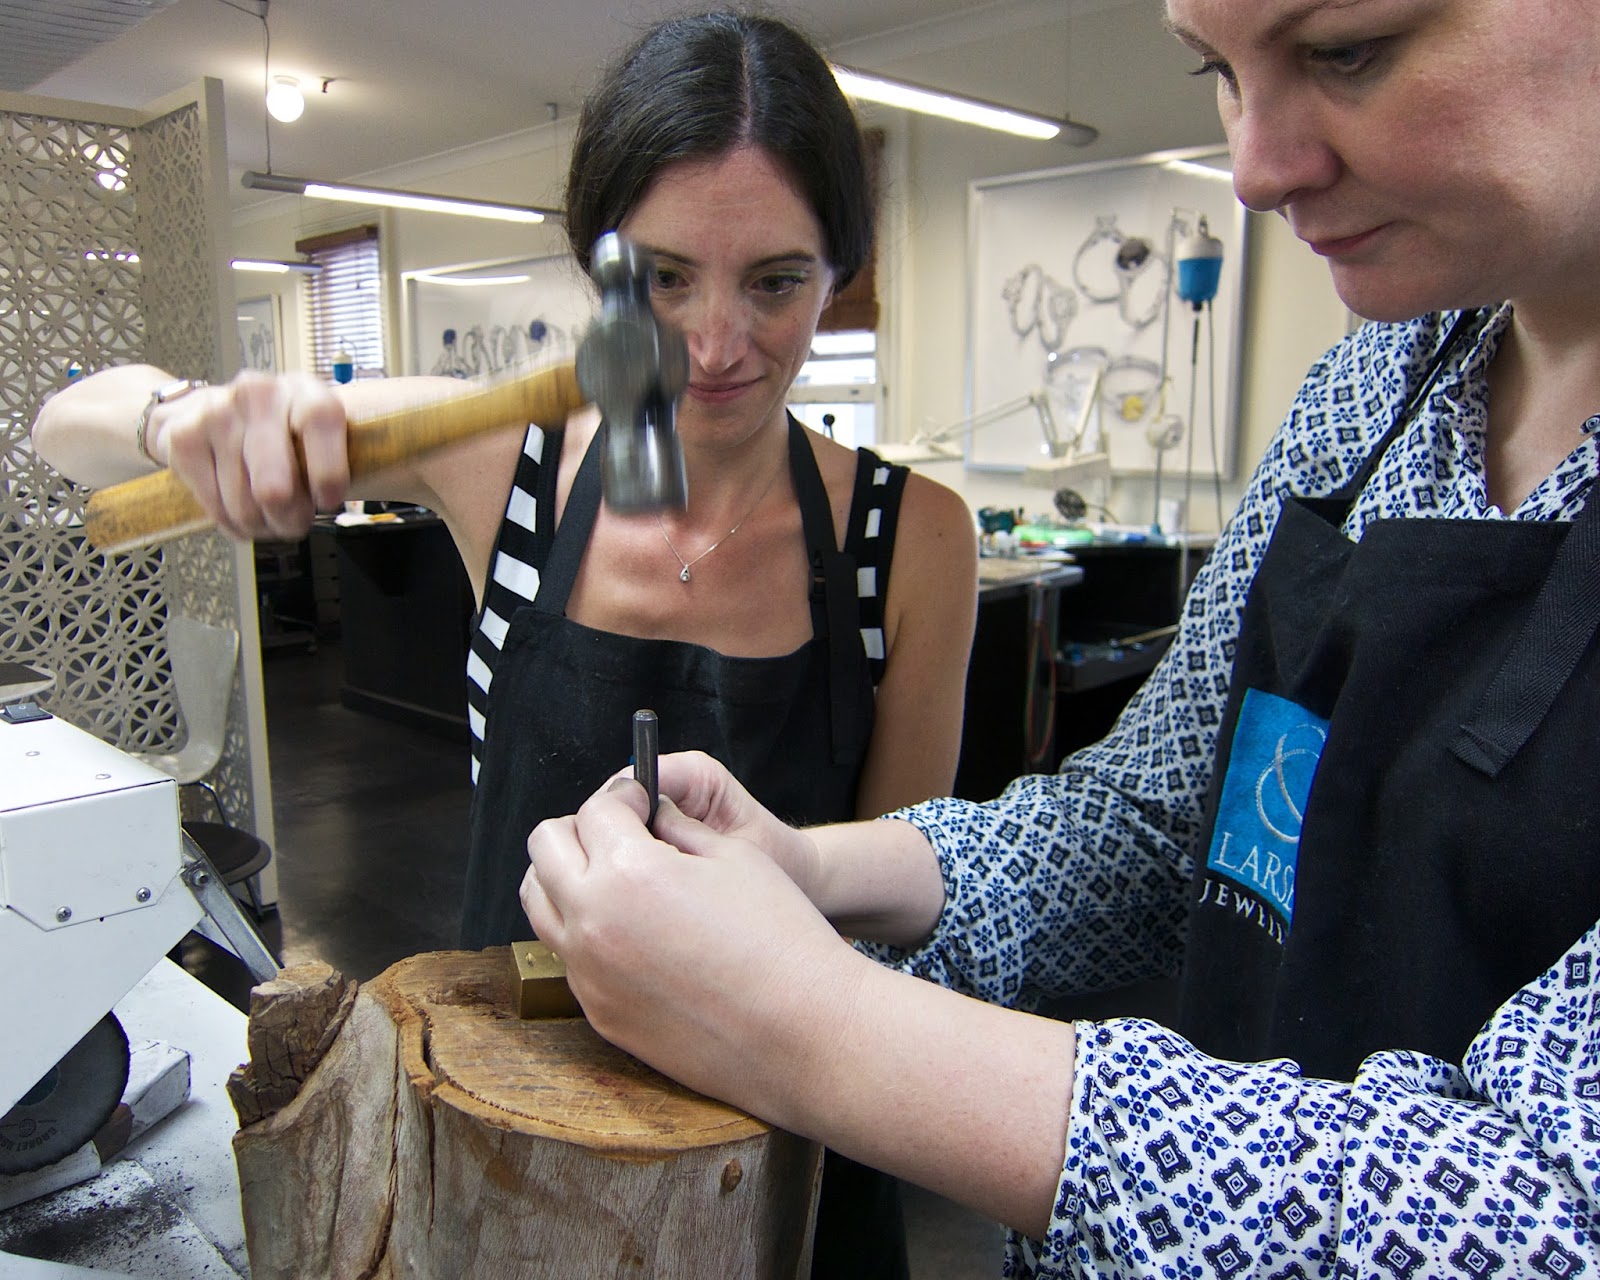
LOOK AT THE CONCENTRATION, PEOPLE! "Please God, let me hit the stamp, the stamp, please, let it be the stamp...." My ring now proudly bears two stamps (one identifying the type of metal and one the stamp of the jeweller) and no-one broke anybody's anythings. Success!
Finally, it's time to bling the ring:
Putting the polish on was one of the most enjoyable parts for me - partly because this piece of drab-looking metal you have been working on all day slowly metamorphoses into a beautiful, shiny piece of precious metal before your eyes, but mainly because it was the one machine I could damn well operate.
And finally, after all the rolling, annealing, hammering, filing, soldering and polishing, you go from this:
To this:
Real shiny wedding rings that look like actual rings even though you made them yourself!
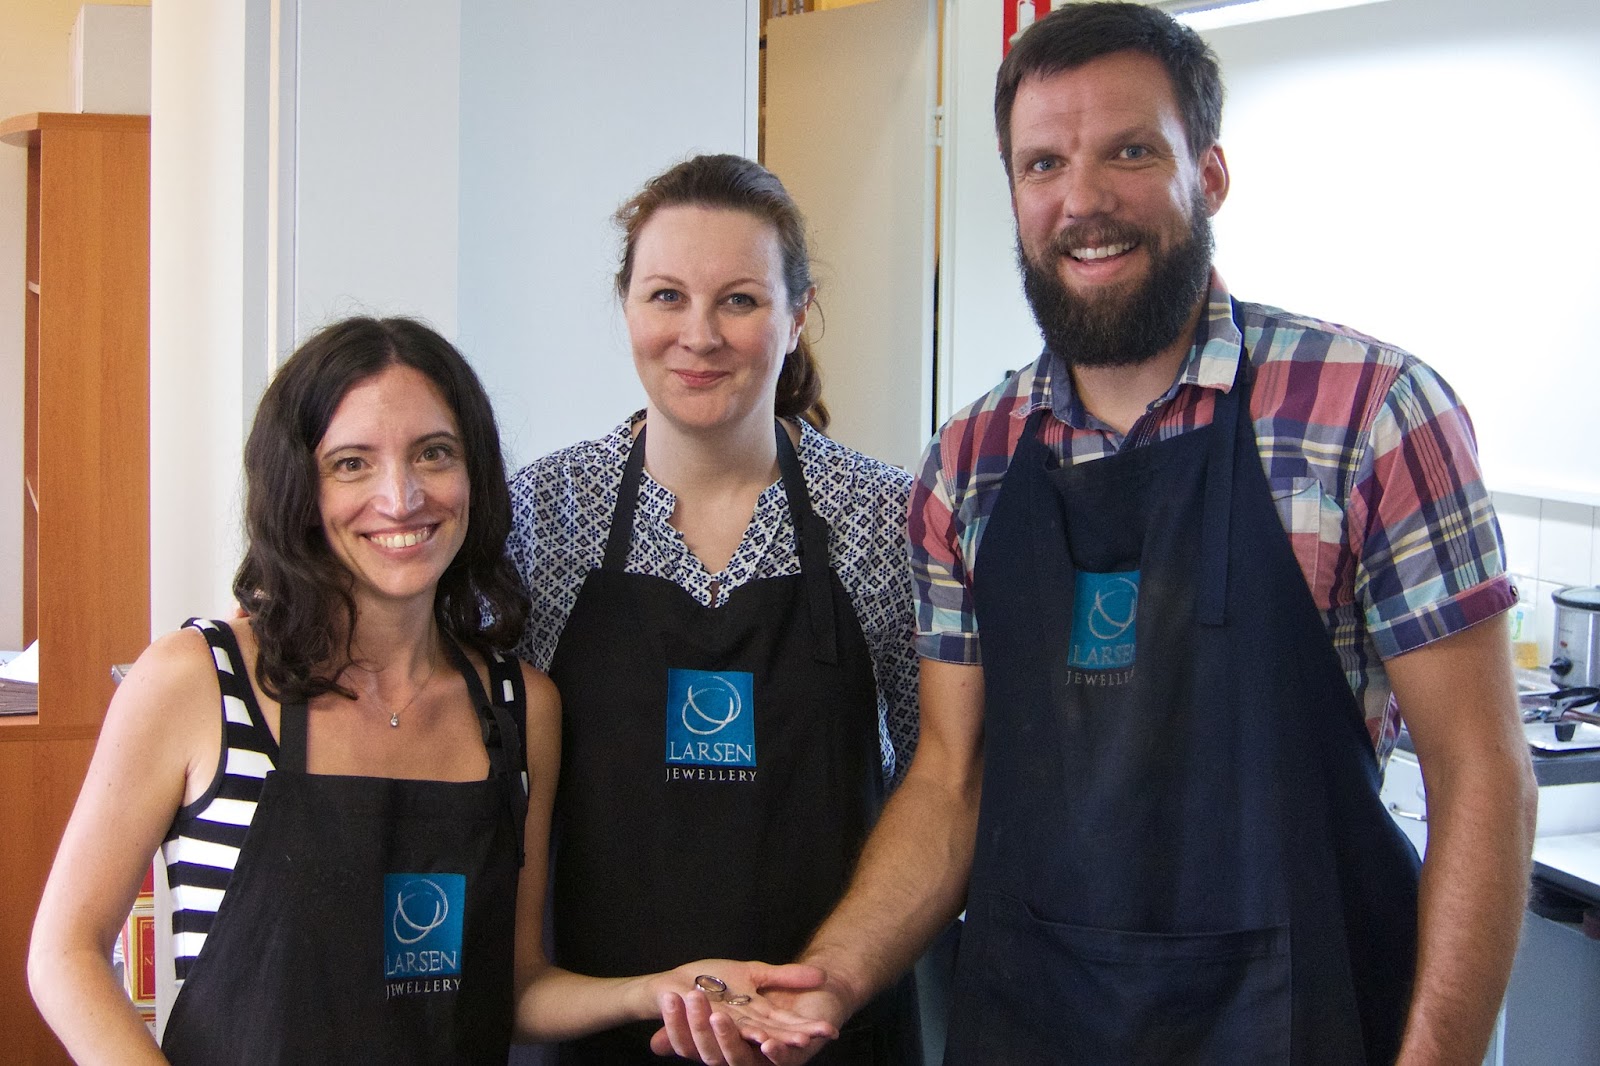
We were super pleased with the results and more than a little bit proud. Wedding rings are obviously of highly sentimental value anyway, but to make your own just feels that little extra bit special. And we had such a lovely, skilled and patient person helping us with each step, and lots of interest from everyone else in the workshop as to how we were going, that it made it for a really enjoyable and interesting day. Jan has decided to opt for the traditional German style of wearing the ring on his right finger, and I have opted to have a bit of bling on mine. So there you are! Wedding rings in 20,000 easy to follow steps!
And just to finish everything off on a high, the jewellers give you a bottle of champagne to celebrate. Which clearly, being people who just love to overstay our welcome, we drank until after the workshop shut!
Dear God, just get these people out of here already!
Many, many thanks to Larsen Jewellery for giving us such a special day. We truly enjoyed all of the experience and would highly recommend it.